Virtualbox is an open source virtualization product that supports a wide variety of OS's. Among other things, it is supported on my OS of choice, FreeBSD, and allows me to run test environments with Windows 8 and other OS's. Recently, however, I ran into a dbus bug that doesn't allow me to choose the ISO image to boot from. Well, rather than just write up a quick article on how to mount an ISO without the GUI, I figured I would do the whole thing and create a VM from the command line. In this case, we will be creating a KALI linux system for pentration testing.
We can use VBoxManage command to create and manage a virtual machine. If we execute the VBoxManage command alone, it will generate a very large amount of help, of which only the top part is shown here:
[tethys]:/home/rnejdl> VBoxManage
Oracle VM VirtualBox Command Line Management Interface Version 4.2.12_OSE
(C) 2005-2013 Oracle Corporation
All rights reserved.
Usage:
VBoxManage []
General Options:
[-v|--version] print version number and exit
[-q|--nologo] suppress the logo
[--settingspw ] provide the settings password
[--settingspwfile ] provide a file containing the settings password
Commands:
list [--long|-l] vms|runningvms|ostypes|hostdvds|hostfloppies|
bridgedifs|hostonlyifs|dhcpservers|hostinfo|
hostcpuids|hddbackends|hdds|dvds|floppies|
usbhost|usbfilters|systemproperties|extpacks|
groups
...
The first step is to create the VM and in the case of Kali, it is closest to Debian in that it uses .deb packages so we'll go with that.
[tethys]:/home/rnejdl> VBoxManage createvm --name KaliLinux --ostype Debian --register
Virtual machine 'KaliLinux' is created and registered.
UUID: 5d00f26d-98dd-48b7-b2c8-213897960e4e
Settings file: '/home/rnejdl/VirtualBox VMs/KaliLinux/KaliLinux.vbox'
[tethys]:/home/rnejdl>
You can check your machine by running:
[tethys]:/home/rnejdl> VBoxManage showvminfo KaliLinux
Name: KaliLinux
Groups: /
Guest OS: Debian
UUID: 5d00f26d-98dd-48b7-b2c8-213897960e4e
Config file: /home/rnejdl/VirtualBox VMs/KaliLinux/KaliLinux.vbox
Snapshot folder: /home/rnejdl/VirtualBox VMs/KaliLinux/Snapshots
Log folder: /home/rnejdl/VirtualBox VMs/KaliLinux/Logs
Hardware UUID: 5d00f26d-98dd-48b7-b2c8-213897960e4e
...
The default memory size is 128M and that is a bit too small. I prefer 1024M and we do that by doing the following:
[tethys]:/home/rnejdl> VBoxManage modifyvm KaliLinux --memory 1024
[tethys]:/home/rnejdl> VBoxManage showvminfo KaliLinux | grep "Memory size"
Memory size: 1024MB
[tethys]:/home/rnejdl>
Sure, you can totally skip this step depending on your configuration but in my case, the default doesn't work so well.
[tethys]:/home/rnejdl> VBoxManage modifyvm KaliLinux --bridgeadapter1 msk1
[tethys]:/home/rnejdl> VBoxManage modifyvm KaliLinux --nic1 bridged
[tethys]:/home/rnejdl> VBoxManage showvminfo KaliLinux | grep "NIC 1"
NIC 1: MAC: 080027B95741, Attachment: Bridged Interface 'msk1', Cable connected: on, Trace: off (file: none), Type: 82540EM, Reported speed: 0 Mbps, Boot priority: 0, Promisc Policy: deny, Bandwidth group: none
[tethys]:/home/rnejdl>
This command will create the drive whereever you are located so I put in the relative path to keep things clean and organized.
[tethys]:/home/rnejdl> VBoxManage createhd --filename VirtualBox\ VMs/KaliLinux/KaliLinux.vdi --size 18000 --format VDI
0%...10%...20%...30%...40%...50%...60%...70%...80%...90%...100%
Disk image created. UUID: cbaf6757-94cf-4385-bac9-8281dc1adbb0
[tethys]:/home/rnejdl> VBoxManage storagectl KaliLinux --name "SATA Controller" --add sata --controller IntelAhci
[tethys]:/home/rnejdl> VBoxManage storageattach KaliLinux --storagectl "SATA Controller" --port 0 --device 0 --type hdd --medium VirtualBox\ VMs/KaliLinux/KaliLinux.vdi
[tethys]:/home/rnejdl>
We need to mount a cd/dvd rom to our virtual machine in order to start the OS installation. I've already downloaded the ISO file so I am mounting it here.
[tethys]:/home/rnejdl> VBoxManage storagectl KaliLinux --name "IDE Controller" --add ide --controller PIIX4
[tethys]:/home/rnejdl> VBoxManage storageattach KaliLinux --storagectl "IDE Controller" --port 1 --device 0 --type dvddrive --medium Desktop/kali-linux-1.0.1-i386.iso
[tethys]:/home/rnejdl>
You can check your work by running:
[tethys]:/home/rnejdl> VBoxManage showvminfo KaliLinux
Name: KaliLinux
Groups: /
Guest OS: Debian
UUID: 5d00f26d-98dd-48b7-b2c8-213897960e4e
Config file: /home/rnejdl/VirtualBox VMs/KaliLinux/KaliLinux.vbox
Snapshot folder: /home/rnejdl/VirtualBox VMs/KaliLinux/Snapshots
Log folder: /home/rnejdl/VirtualBox VMs/KaliLinux/Logs
Hardware UUID: 5d00f26d-98dd-48b7-b2c8-213897960e4e
Memory size: 1024MB
...
At this point, you can either start the VM from the GUI or you can start it up using VRDE.
[tethys]:/home/rnejdl> VBoxManage modifyvm KaliLinux --vrde on
[tethys]:/home/rnejdl> VBoxManage modifyvm KaliLinux --vrdemulticon on --vrdeport 3390
[tethys]:/home/rnejdl> VBoxHeadless --startvm KaliLinux
Oracle VM VirtualBox Headless Interface 4.2.12_OSE
(C) 2008-2013 Oracle Corporation
All rights reserved.
You can remote desktop now to that machine if you know the IP of it.
[tethys]:/home/rnejdl> rdesktop 192.168.254.101:3390
In my case, I started it up using the GUI and was greeted with:
___________________________________________________________________________________
Today virtualization is a major component of IT industry. We can see virtualization is gaining popularity in server, network and storage domains. To fulfill users need many open source virtualization solutions came into existence and Oracle VirtualBox is one of them.
In this article we’ll discuss VBoxManage utility which is used to manage VirtualBox from command line interface. Below is the syntax of VBoxManage utility
$ VBoxManage [<general option>] <command>
In above command general option can be verbose mode, suppress logo, response file etc. Command can be various actions like – create vm, list vm, show vm information etc.
To create VM we have to use createvm command with VBoxManage utitlity. Below is the syntax of same:
createvm --name <name>
[--groups <group>, ...]
[--ostype <ostype>]
[--register]
[--basefolder <path>]
[--uuid <uuid>]
We can list supported OS types using below command:
$ VBoxManage list ostypes
Let us create Ubuntu-64 vm from CLI:
$ VBoxManage createvm --name ubuntu-server --ostype Ubuntu_64 --register
When you execute above command it will generate following output:
Virtual machine 'ubuntu-server' is created and registered.
UUID: 7433725a-f314-44c7-8625-91d61cc6125d
Settings file: '/home/linux-techi/VirtualBox VMs/ubuntu-server/ubuntu-server.vbox'
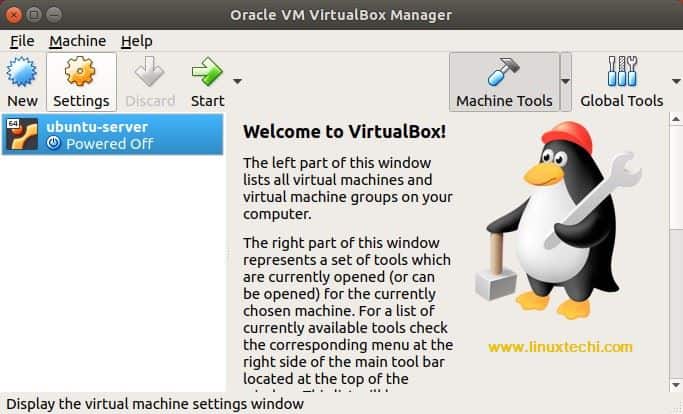
Now we can see newly created VM in VirtualBox Manager
We have successfully created VM from CLI. But this VM is not usable at this moment we can make it usable by assigning NIC, allocating memory and attaching disk to it.
To create bridged network execute following two commands:
$ VBoxManage modifyvm ubuntu-server --bridgeadapter1 vmnet1
$ VBoxManage modifyvm ubuntu-server --nic1 bridged
In above example I’ve use vmnet1 network. It is created by default when Oracle VirtualBox is installed.
To allocate memory execute following command:
$ VBoxManage modifyvm ubuntu-server --memory 2048
To create hard disk execute following command:
$ VBoxManage createhd --filename VirtualBox\ VMs/ubuntu-server/ubuntu-server.vdi --size 10000 --format VDI
When you execute above command, it will generate following output:
0%...10%...20%...30%...40%...50%...60%...70%...80%...90%...100%
Medium created. UUID: 5f530d25-da57-4030-bf56-32d5a29c91b5
This command will create virtual hard disk. At present it is not associated with any VM.
In previous section we have created virtual hard disk. We need a SATA controller to attach that disk. Below command creates SATA controller.
$ VBoxManage storagectl ubuntu-server --name "SATA Controller" --add sata --controller IntelAhci
Attach storage
Now we have SATA controller and virtual hard disk in a place. Let us attach virtual disk to SATA controller using below command:
$ VBoxManage storageattach ubuntu-server --storagectl "SATA Controller" --port 0 --device 0 --type hdd --medium VirtualBox\ VMs/ubuntu-server/ubuntu-server.vdi
We are creating fresh VM hence we need to install OS from ISO image. So let us add IDE controller using following command:
$ VBoxManage storagectl ubuntu-server --name "IDE Controller" --add ide --controller PIIX4
Attach ISO image to IDE controller
To attach ISO image to IDE controller execute following command:
$ VBoxManage storageattach ubuntu-server --storagectl "IDE Controller" --port 1 --device 0 --type dvddrive --medium /home/linux-techi/ubuntu-18.04-desktop-amd64.iso
Now VM is configured and it is installation ready. Let us start VM using following command
$ VBoxManage startvm ubuntu-server
This command will open VirtualBox Manager from where OS installation can be done.
Snapshot is a point-in time copy of VM. We can take a snapshot using following command:
$ VBoxManage snapshot ubuntu-server take "first-snapshot"
When you execute above command, it will generate following output:
0%...10%...20%...30%...40%...50%...60%...70%...80%...90%...100%
Snapshot taken. UUID: cd5dadc1-dd8f-427e-a6b8-5a3e93307ef9
We can see this snapshot in VirtualBox manager:
To revert back to snapshot execute following command:
$ VBoxManage snapshot ubuntu-server restore "first-snapshot"
When you execute above command, it will generate following output:
Restoring snapshot ' first-snapshot' (cd5dadc1-dd8f-427e-a6b8-5a3e93307ef9)
0%...10%...20%...30%...40%...50%...60%...70%...80%...90%...100%
To delete VM execute following command:
$ VBoxManage unregistervm ubuntu-server --delete
When you execute above command it will generate following output:
0%...10%...20%...30%...40%...50%...60%...70%...80%...90%...100%
Please note that this command will delete all Virtual Machine files (configuration files as well virtual hard disks) from system.
This tutorial is good starting point for VBoxManage utility. Covering each and every detail about it – is beyond the scope of this tutorial. For additional details please refer official document from here
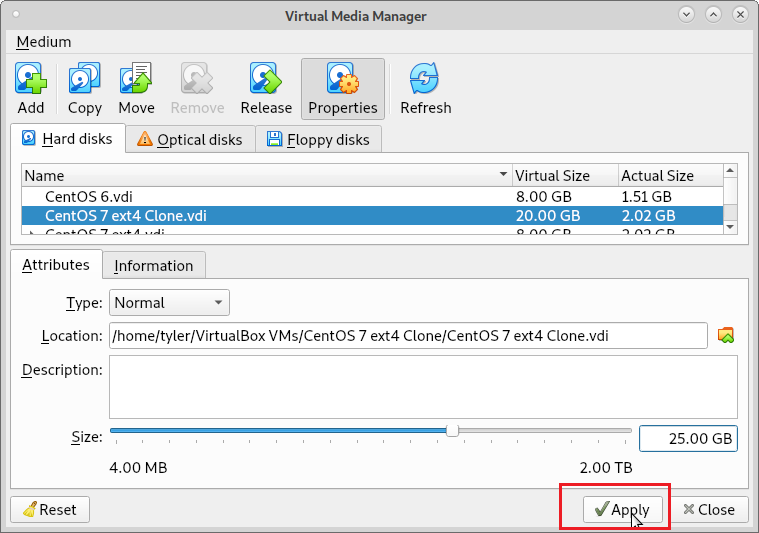
Increasing the size of a Disk in VirtualBox can be done with the GUI or the command line. I will cover both methods. Resizing the partitions and filesystems on the virtual machine using the disk is beyond the scope of this guide.
Directly below are quick procedures. If you want a more in depth explanation or screen shots, use one of these links:
•.GUI
Using the GUI:
1.Shutdown the virtual machine that is using the disk.
2.Open the VM VirtualBox Manager (the main window that opens when you launch the GUI)
3.Click File
4.Select Virtual Media Manager from the menu.
5.Select the Hard disks tab.
6.Choose the disk you wish to resize from the list.
7.Click the Properties button.
8.In the Attributes tab, use the slider or text box to specify the new size.
9.Click Apply.
Using the command line:
First, shutdown the virtual machine hat is using the disk.
Replace MB in the examples with how big, in megabytes, you wish to resize the disk to.
Linux/Unix:
$ vboxmanage modifymedium disk /virtual/disk/file --resize MB
Windows:
C:\> cd C:\Program Files\Oracle\VirtualBox
C:\Program Files\Oracle\VirtualBox>VBoxManage modifymedium disk C:\path\to\file --resize MB
If you are running an older version and one of the commands doesn’t work, try this:
vboxmanage modifyhd /path/to/disk --resize MB
Real Example:
$ vboxmanage modifymedium disk \
"/home/tyler/VirtualBox VMs/CentOS 7 ext4 Clone/CentOS 7 ext4 Clone.vdi" \
--resize 30000
0%...10%...20%...30%...40%...50%...60%...70%...80%...90%...100%
First Open the VirtualBox Manager. It is the window that pops up when you first launch VirtualBox. Now select Virtual Media Manager from the file menu:
On the Hard disks tab of the Virtual Media Manager window, click on the disk you wish to resize.
Once you have selected the disk, click the Properties button.
Using the slider or box, choose the new disk size.
Now click Apply.
First, shutdown the virtual machine using the disk.
All of the commands should be run as the user you run VirtualBox as. There is no need to use an administrative account. If the command to actually make the modification gives you the following the error, replace modifymedium with modifyhd.
Syntax error: Invalid command 'modifymedium'
If you are using Windows, you must be in the VirtualBox installation directory. By default, that is C:\Program Files\Oracle\VirtualBox. If you are using another operating system, ignore this step.
C:\> cd C:\Program Files\Oracle\VirtualBox
The first thing you need to do is determine the file path or UUID of the disk file. Use vboxmanage list hdds to do this:
$ vboxmanage list hdds
UUID: ec525246-7e0c-406c-8957-3ad5ad7cbe3a
Parent UUID: base
State: created
Type: normal (base)
Location: /home/tyler/VirtualBox VMs/CentOS 7 ext4 Clone/CentOS 7 ext4 Clone.vdi
Storage format: VDI
Capacity: 25000 MBytes
Encryption: disabled
You can use either the UUID or the path of the disk file to specify the disk you are resizing. I will show examples of both.
Using the UUID:
$ vboxmanage modifymedium disk ec525246-7e0c-406c-8957-3ad5ad7cbe3a --resize 35000
0%...10%...20%...30%...40%...50%...60%...70%...80%...90%...100%
Using the file path:
$ vboxmanage modifymedium disk \
"/home/tyler/VirtualBox VMs/CentOS 7 ext4 Clone/CentOS 7 ext4 Clone.vdi" \
--resize 40000
0%...10%...20%...30%...40%...50%...60%...70%...80%...90%...100%
If you aren’t familiar with the Linux command line environment, a \ at the end of a line means you wish to continue the command on the next line. The command won’t run until you press enter again.
I recommend always surrounding the file name with “”. If it contains a space or a character that has a meaning to the shell, it indicates to the shell you want it to forego the action it would normally take and treat it as an option to your command.
 VirtualBox-Manager-Ubuntu-Linux
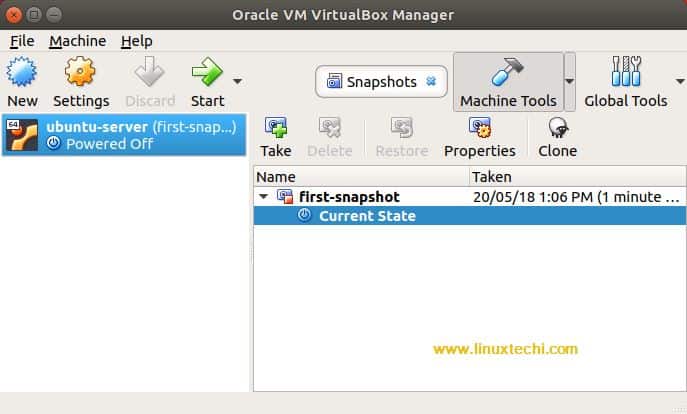 VirtualBox-VM-Snapshot-Linux
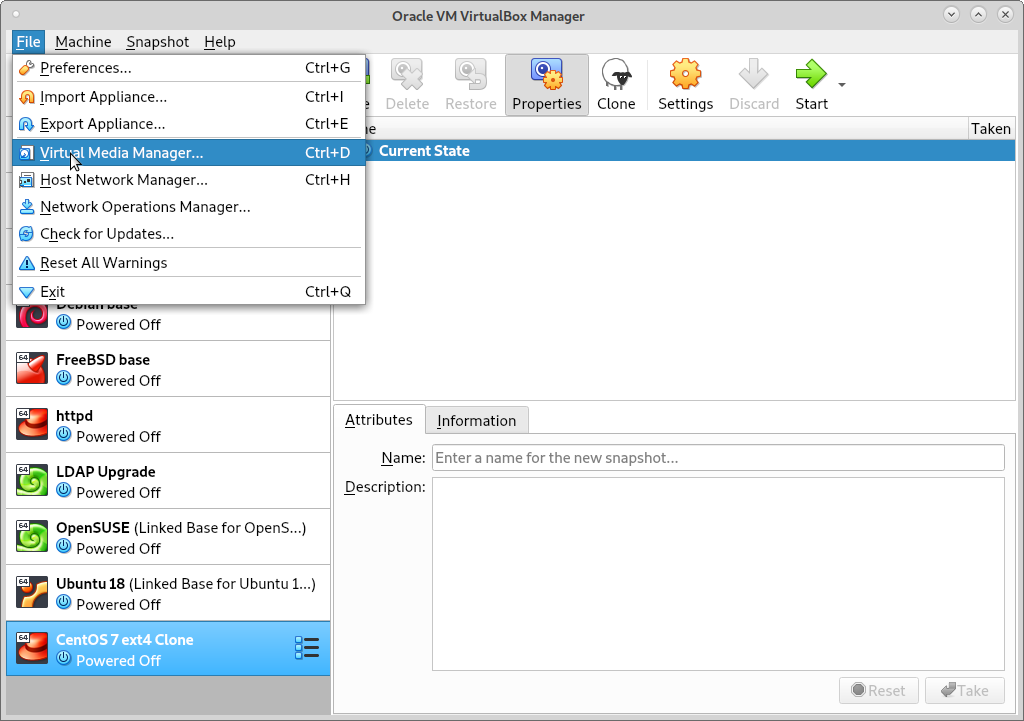 Select Virtial Media Manager
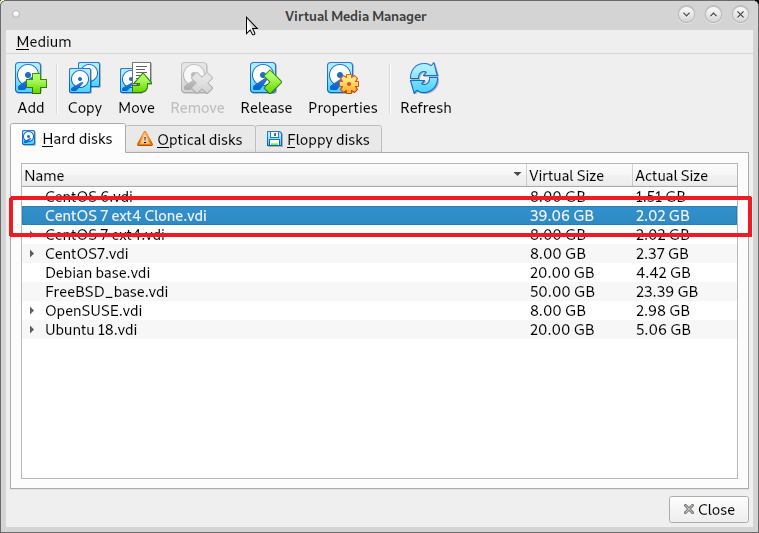

 Use the slider or box to specify the new size